31 maart 2015

Fotobella bag

It's been a while since I posted.  The girls have outgrown my wildly colorful style by now, although this bag was still very much approved of.  I used the Fotobella pattern via Farbenmix, and the Pimpirazzi and Eingerahmt embroidery files via Huups. The ''photo's'' on the back of the back are the last scraps that were left after taking apart seam by seam a toddler size 2Y raincoat by Dutch brand Mim-Pi that had this really cute ''Blythe'' doll photo print.  If anyone knows how one could obtain fabric from the bolt (anyone's aunt working for Mim-Pi 

;-) I would HIGHLY appreciate it.   Seriously.  Talk about a real nutcase or a sucker for a cute fabric... I carefully took apart the entire rain coat seam by seam so I had these little scraps of fabric left for my own projects.  Forget selling off that raincoat second hand, I'd rather save the fabric!!!


17 augustus 2014

Follow my blog with Bloglovin

<a href="http://www.bloglovin.com/blog/5648615/?claim=4zpzf9rkffa">Follow my blog with Bloglovin</a>

19 februari 2012

Dominique set


 I finished this set a while ago in anticipation of todays birthday party of one special little princess.  Only posting now because we are getting ready to leave for the party, and I did not want to spoil the surprise by blogging the pics in advance.  I'm hoping she and her mom like it.  For the skirt I started out with the FM Venice pattern, adding an underskirt, shirring to CF and CB, and additional ruffles.  The top is an adjusted BizzKids 3103, I had to take in the chest circumference by almost 5cm which I find a lot on a childrens size 6T.  Now it is true that the princess in question is particularly petite and delicate but still.  Fabrics are al 100% cotton, the white is a poplin and the white-with-pink is broderie (eyelet) All materials UWYH, yay!  


02 januari 2012

Beertje dress

Inspiration is everywhere... I love to look at details of cute girls clothes in store, and then try to put my own spin on it.  The dress itself is a rather basic two-tone tricot dress with three quarter sleeves and a boat neck.  I built it from a basic fitted t-shirt pattern. The dress is supposed to be form fitting but not super tight.  Different fabrics make a whole different looking dress each time.  This one is in Stenzo fabrics.  DD is happy with it, see last pic.  I´m on to the next as these type of clothes get most wear mileage with my girls.  Comfy clothes that look dressy.

Jump rope dress

She surely does not look too happy with this one... Could be the mood of the moment, let´s hope so.  I think this dress is totally cute.  It has a nice fitted style, simple and sophisticated at the same time.  Fabric from stash, a cotton bamboo blend chambray.  The pattern is the Jump Rope Dress by Oliver + S, until recently darn difficult to find because it was OOP.  Until Ms Gibson made it available for download through her website for $9.95, a link is here.  I highly recommend this pattern. Any of her patterns, really.  Each one is like taking a mini sewing class.  For a new generation self taught seamstress like myself who finds answers on ´´how to´´ mostly on YouTube, reading proper sewing instructions can be a real treat.  For instance by making the Sunday Brunch jacket, I learned a lot about neatly finished interfacing which technique I since then have applied to other projects, like the velvet blazer blogged about earlier.  Can´t recommend the Oliver+S brand enough.

Bluuuuuuuuue Velvet (Blazer)

I purchased this too adorable basic woolen skirt by Bengh, picture here.  Yes I know this is a basic skirt but I just loved the sassy color and the sassy grown up style for my 5 year old.  Mind you, I purchased 134-140 size which is at least two sizes bigger than I usually buy, so beware for the odd sizing this brand sometimes has.  There was a beautiful velour blazer jacket in either a kit color or a dark blue too, click here if you want to see it.  List price of the jacket was 129,- EUR, and sold out before ever going on sale (at least in the size I needed).  Ugh,  and unbelievable.  So.  What else could I do?

The pattern I used can be purchased here.  I made an adjustment to the backside to add the bow decoration and added an inverted pleat to CB.  I also faked the flap style hidden pockets.  This is a kids blazer after all.  I sewed a sz 116 (US 6) with half an inch of additional length to the bodice and the sleeves, my idiot proof approach to make any commercial pattern a more slim fitting style.  With such small additions I usually don´t bother to slash the pattern at the waist and add the length there.  Except for OIiver + S patterns I do this to all commercial patterns I use. But of course it depends on the body type of your child.  I used a fabric from my stash, a royal blue poly/cotton velvet from the remnant bin picked up years ago on a closeout sale.  It has a very short pole, which I suspect is the reason it sewed up like a dream.  Other velvets I have sewn before (100% cotton, or silk-rayon blend) all tended to walk away from the presser foot, leaving me with a frenzy of puckers. 

To complete the outfit I bought this top, the bow of which you can see in the pics. All in all, I am very pleased with the result.  DH´s comment was hilarious, his first one was ´´she looks like a tiny KLM flight attendant´´. What do you think?

01 december 2011

Gold Star Dress and velvet leggings

I saw this dress by Bengh that I really really like a lot. It´s a jersey dress with a slim fit and three quarter length sleeves with a ruffle. A nice, basic, comfy dres for little girls. What makes it so special is the fabric: a grey jersey with big blue (or red or green, they come in different colors) dots. They remind me of christmas ornaments!   

All said and done, the dress is quite expensive (the whole brand is quite expensive) and were it not for the exclusive special fabric, the simple model is IMHO not worth the hefty tag. Liking the style, I wanted to make someting similar. I drafted a pattern using my favorite t/shirt pattern, the Ottobre slim fit tee pattern (Creative Workshop 301) in sz 122 and elongated it by about 15 cm plus hem. I widened the neckline by 1.5cm on each shoulder as most Bengh tops have a bit of a boat neck. Didn´t want to make it too wide though or it will look weird on skinny little girls necks. So far it was easy. What fabric would give the same holiday atmosphere, and would have the same vintage feel as Bengh. I settled on cutting up and old sweatshirt dress of myself, because it has a nice grayish jeans blue color, plus for the true vintage feel, was already worn in pretty well. I carefully cut up the dress on the seam lines, ironed the parts, and got out my magic little pot of gold (fabric paint, that is). I painted stars on each panel until I ran out of paint, too bad because I was on a gold star mission, could´ve gone on for hours haha. Sewed up the dress, made a little backside pocket using the old kangaroo pocket from the front. Was pondering to add a bow at side of the neckline but did not have the right fabric to sew one, and a ribbon bow looked too flimsy. So no bow. Then to stay somewhat true to the brand inspiring it all, I sewed up a pair of dark blue velvet leggings. We had to toss which girl got to wear the outfit first today, even my pants-only girl likes it that much. ´´Yeah it´s a dress but it doesn´t matter ´coz it has gold STARS!!!´´ Don´t you just love it when your goodies are received in such cheerful manner!

25 november 2011

Preppy girls blouse

Peter Pan collars are super hot in womens fashion for this season, but for young girls this style never ever has  been out of fashion.  Never will either I suspect.  I drafted a pattern using bits of everything, for instance the shirred back panel comes from an old Ottobre.  Pretty pleased with the end result.    

The fabric is a gorgeous quality cotton poplin, in a pale blue with cream, brown and medium blue dots.   And tiny Mickey Mouse figures. I suspect this is fabric overrun from Donaldson, I bought it in Belgium for 3 euro per meter. The blouse goes really well with the Oliver+S skirt from last post by the way.
The bad new is, Ms Pfaff threw a hissy fit when it was buttonhole time.  At least ten messed up buttonholes and much cursing further, I got my old Elna from the attic and finished the blouse with her. Ms Pfaff is now being serviced by the dealer.  Apparently there is a problem with the fabric transport.  When making buttonholes, the fabric tend to bulk up under the pressure foot making a big tangled mess.  Also, the two ´´caterpillars´´ sew up unevenly.  If anyone who has the same machine recognizes this please let me know how you solved it.  I have a Quilt Expression 4.0.  Thanks!

19 november 2011

Oliver+S boucle skirt and cache coeur shirt


It´s been a while since I last made something, but this adult fabric combination was just begging to be made into a smart outfit for my now 5 year old.  The skirt is the Oliver+S Sunday Brunch skirt which has a small kick pleat in the back as well as elastic in the back part of the waistband.  I ran a double row of stitches along the seam and carefully removed the extra fibers so the hem has a fringed edge.    The shirt is made from a basic tee of which I adjusted the front pattern part into a crossover style.  *You basically draw a full front panel instead of one half only by mirroring the typical shirt front against center front over to the other side. Then comes the fun bit, adjusting it.  I scooped out the neckline at the shoulder a bit (about half an inch - don't forget to adjust the shoulder of the back panel to match), and then drew a slightly scooped line to the opposite side seam. 

 
Cut 2, and attach the shoulders to the back panel.  Then, cut a 2 inch wide strip of fabric, fold lengthwise wrong sides together, iron, serge together, and use this strip to finish the neckline.   The top half is straight, the bottom half of the front is ruched at the side seams - I added about 3 inches of extra length to the front pattern pieces for that.  I realised when it was finished I had to stitch the wrapover part closed as otherwise it would be gaping on a childs chest.  That then insipred me to the tiny velvet bow with the small MOP heart on center front.   DD likes it a lot and insist on wearing it today so I have to go now because I need to dig out dark blue tights and a dark blue cardi since it's just above freezing point today! What are you sewing today?

07 oktober 2011

Ciara puffball skirt with apron


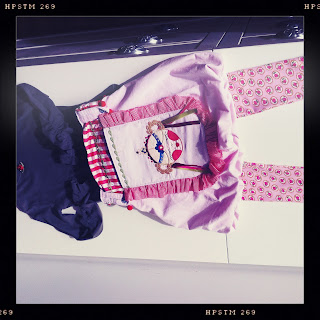
Yay, another design finished.  The ideas  always bubble up quicker than I can realise them with my hands. I am very proud of this one since I did not use a purchased pattern for the skirt - it´s my first own design!  This literally formed under my hands.  It all started with this beautiful palest pink babycord that I had some 70 cm left of.
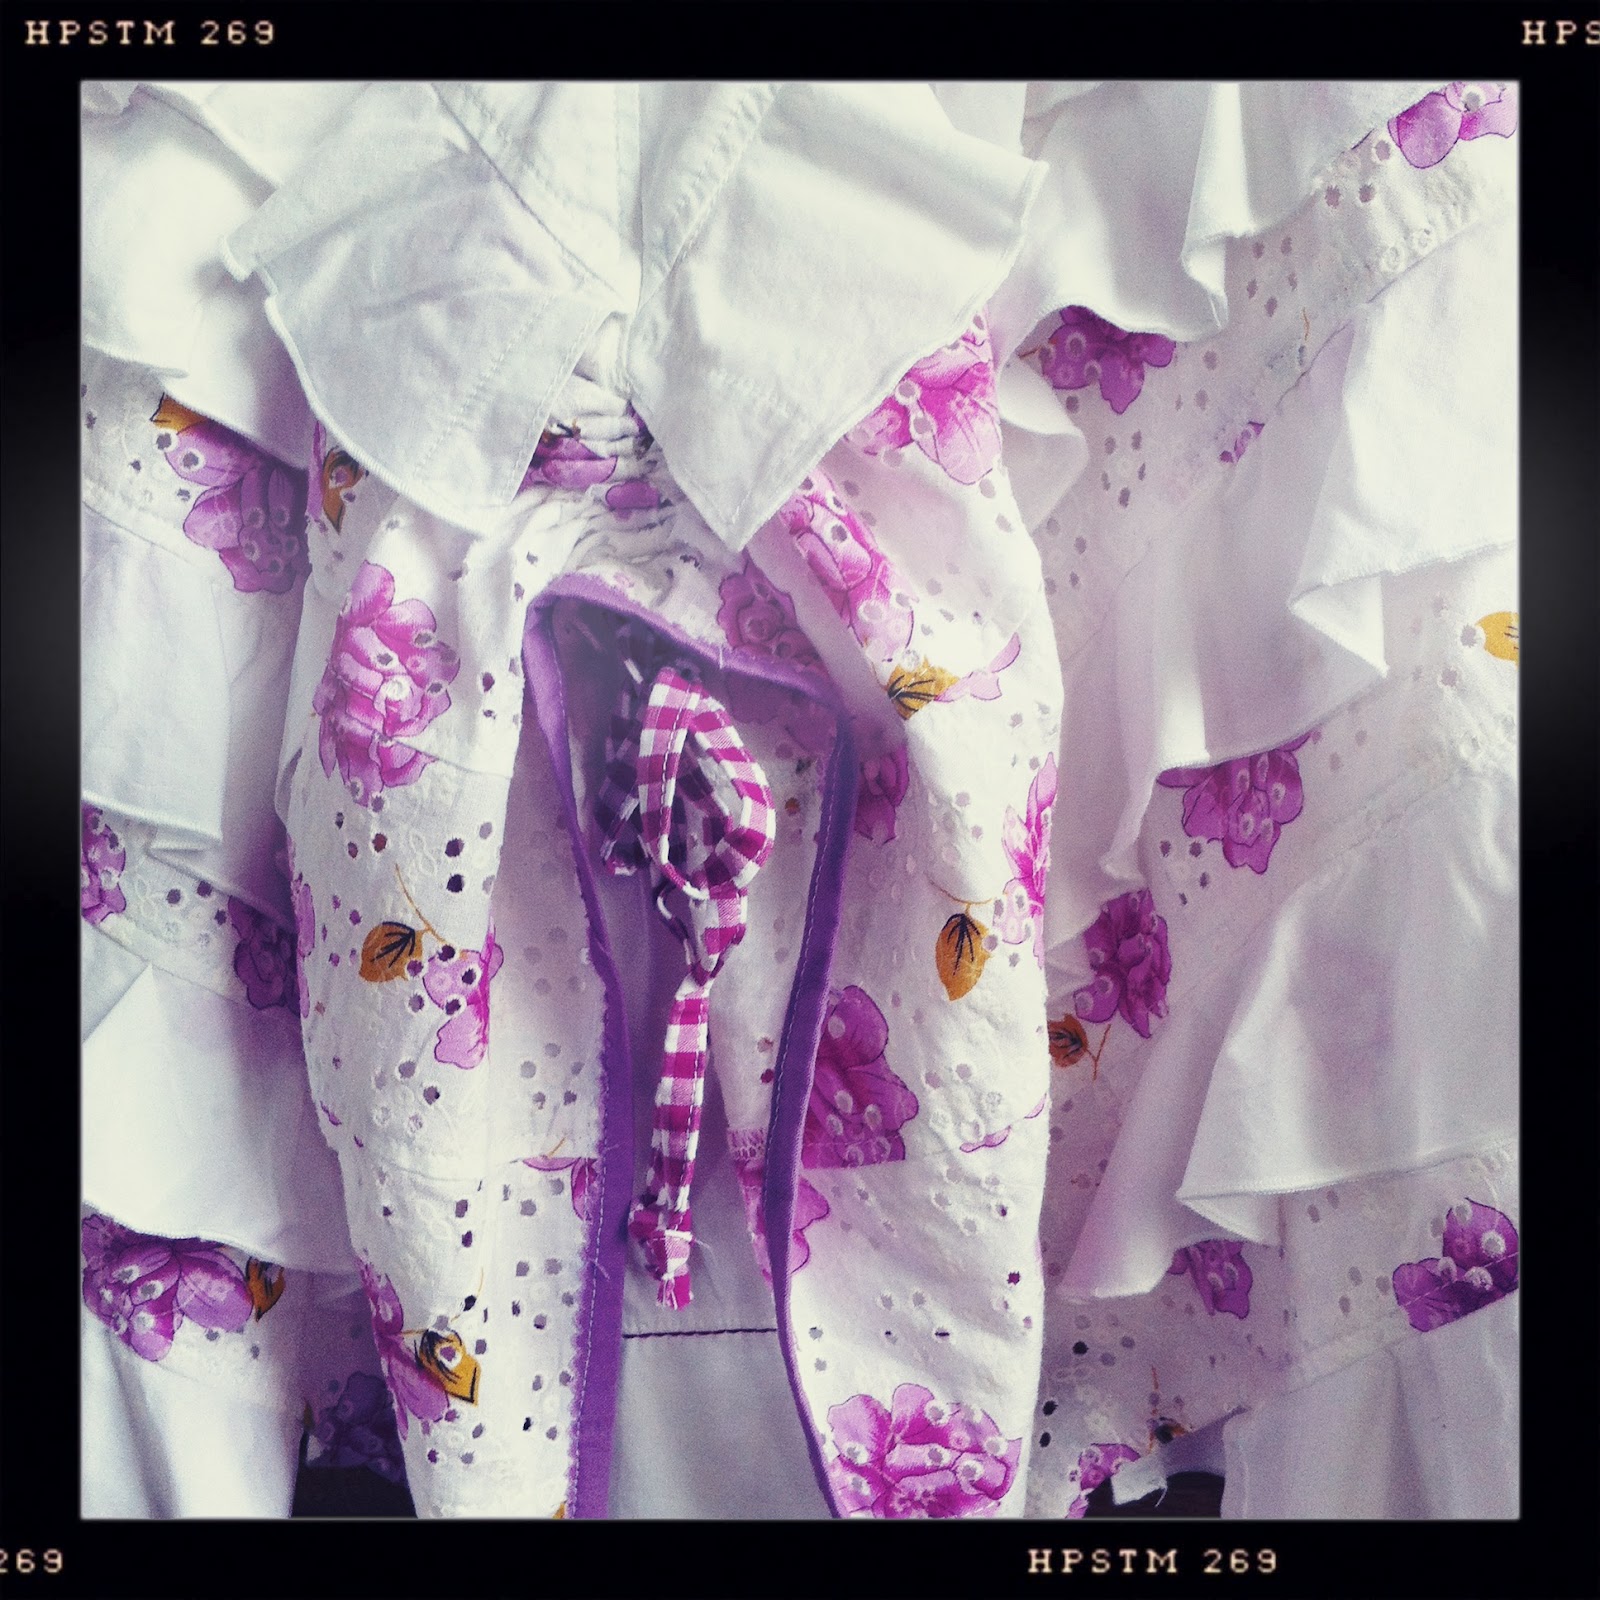
 Given the amount of fabric left the options were limited so I chose to make a puffball skirt out of it.  While most children´s skirts work with elasticized waistbands, sometimes I want a cleaner look so I sewed in 6 pleats from the waistline.  And cut a fitted waistband to top it up.  Now, the skirt falls beautifully smooth along the hips, and the volume starts happening lower.  For lining I used a cotton knit so the lining would stretch (to create extra puff in the puffball, I cut the lining smaller than the top layer.  Choosing a knit helped creating enough room for movement for my DD when bicycling - this is Holland after all, so one has to be practical!).  Now, this combination of fabrics certainly challenged my concealed zipper skills!  I had enough fabric left to make a cute apron to go with the skirt.  I embroidered it with a blonde 
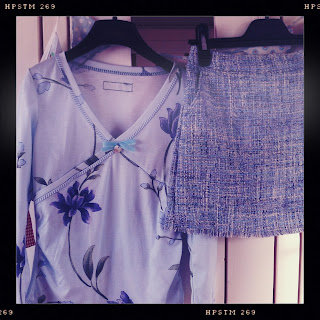
Mascha.  And then I figured, if I double it up, it would be a cool purse too! Now DD can tote along all the important stuff (most noteably, Bambi and fairy wand) everywhere.  So, after some fidgeting, rumbling through the remnants box, and testing some fine stitches on my Pfaff (Note To Self- Must Not Forget To Match Underthread To Top Thread When Wrong Side Shows Too), this is the result.  For days when you want to tone the loudness of the skirt down a bit, it can be worn without apron too.  To go with it, I wanted a shirt that would not be too sweet.  I found this old Diesel shirt in my remnants box which had just the right army green color.  You see, when I clean out my closet, anything that has nice fabric and color will not go to charity but to the sewing room.  At the pace my girls are growing, I doubt whether I will be refashioning my old shirts for them much longer though... This one was kinda hard already!  I even sewed the old collar back on, inside out.  I would normally not do that but I simply had not enough fabric left to cut a new neck binding strip.  And since this is the kind of shirt that is allowed to look used and beaten up, I think it turned out quite well. Some cute girly details added (ruched sleeves, a red satin rose) and voila. The leggings are made from Stenzo tricot from my stash.  Nothing new purchased for this project, even recycled two old shirts of mine (the other one went into the skirts lining) to this is truly UWYH (Use What You Have)! Ehm, maybe this just means I have a lot. And, I do. And I´m grateful for it.  In every way.  Stay tuned!


26 september 2011

Nonita pants

Finally, they´re finished... These pants took an awful lot of time, not only because I wanted to use a nicky velours because it had the right color (which meant first flat lining certain pattern pieces to stabilize the stretchy fabric with a woven underneath) but also because of the elaborate decorations.  I love it though, every once in a while, to make something in proper Farbenmix style. Last night I hammered in the poppers, argh what a frustration.  I don´t understand why some people see poppers as a lazy womans type of closure as I find it sooo much easier and quicker to just sew a couple of buttonholes.  Anyway, my DD will be grateful for these as they will be easier to manage for her small hands.  When the pants were finished and I showed them to her she said ´´beautiful mommy´´ so hopefully we´ll get a lot of mileage out of these. The Nonita pattern is actually meant to be 3/4 length so I sewed one size bigger hoping she can wear it for two winters.  The pattern is totally cute with its unusual flap front closure.  Will make more!

20 september 2011

Tinka Bella fall jacket

Here is the jacket I made for the in between, when it´s too cold for a jeans jacket but not quite cold enough for a full down jacket.  The shell is Tactel fabric, the lining a furry polyester (and the sleeves have a separate stepped lining).  The pattern I used is Tinka Bella from Farbenmix.  The fabrics are mostly from Michas Stoffecke except for the Delft blue detail on the visor and the midriff.

I like to add that little wink to my Dutch nationality wherever I can, and you´d be amazed at how well the Delft blue colors combine with almost anything! You also see that every scrap gets used here as the remains of the purple vichy check served as a backing for the scrappy scarf I posted yesterday.  The pattern is fun to make and the fit is nice. 

By making extra long cuffs these can be simply turned up in year 1, and turned down in year 2 so you get more mileage out of it. The pockets are cute, as is the shape of the hood with visor. And it´s not hard to make thanks to the excellent step by step provided by Farbenmix. I will definately make this again!

19 september 2011

Back To School t-shirt

For my no-pink-no-dresses-please girl, I wanted to make a tee that would still be a girls tee without being overly sweet (or pink, for that matter).  What can I say, it´s just a simple t-shirt.  But I had fun making the road go round the back, and the DD loved it. The embroidery design is from Emioli.  The fabric a beautifully soft cotton bamboo blend knit from fabric.com
 

scrappy scarf

Sometimes I simply cannot resist the beautiful fabric combinations of a jelly roll.  Then, I do rarely quilt as I find quilting projects simply too big - although the end result can be impressive, I find it hard to stay focused.  So.  I have these beautiful jelly rolls sitting in my sewing room unused.  Then a couple of days ago, I decided to do something totally different with them.
 

I pulled out the ones I liked the most which were all beautiful pink colors, and added pink silk remnants from my wedding gown.  Although all pink or pink-ish, I tried to make the mix sophisticated, not girlie, as I was aiming to make an adults scarf.  Half a day of sewing/ironing/topstitching and embroidery further, here is the result.  This was a fun and rewarding project to do, it was quick and a great way to do something with even the smallest remnants! Note to self: Must Make More Scarfs.  These Make Great Gifts.

14 september 2011

Nala goldfish PJs - or how I started sewing


Today a smaller project - a piama for my youngest.  We call it Goldfish PJs because of how the ruffles at the hems remind me of the tail and fins of those fancy goldfish one sees at Chinese restaurants, and obviously because of the color (grin).  Fortunately when she came out of school she went ´´aaaaaah, Mommy, I love it´´.  So now she´s upstairs snoring contently in her new outfit. 

The pattern I used is Nala by Farbenmix although I shortened the ruffle by 2 cm and elongated the sleeves and legs by the same 2 cm.  I have to tell you, I have a special conenction with the Nala pattern as this is the one that got me into sewing in the first place, now about 4 years ago.  I had never sewn before nor taken any classes but was confronted with the never ceasing need to buy more clothes and stuff  in the next size up when my twins were born.  I was simply astounded with the prices some brands sometimes ask for simple stuff.  In addition, it was hard to find the colorful look I loved so much from growing up with Oilily myself.  Therefore I started to explore whether it would be difficult to make something myself.  I came across this pic of the Nala pattern with a Marieke dress and I just loved it.  It shows a bright orange dress with a huge butterfly applique, combined with a hot pink shirt and leggings... Colorful, playful, one of a kind.. ever since I have been trying to retrieve that sometimes wild, sometimes more subdued, but always colorful and playful look for my own kids. 

And yes, I know I can buy velour PJs for 15 Euro at H&M.  But that´s beyond the point, isn´t it?

12 september 2011

Bandito hoodie and lazy skirt

 
Here the first Bandito hoodie I made for my eldest.  It is a lovely pattern to make as it gives you ample possibilities to mix and match.  Mine is a true recycle project since the light pink parts were cut from a much beloved and very thick cotton poly hoodie by surf brand Roxy that I couldn´t part with, but that had been sitting in a box in the attic for years.  The light pink trim around the hood is an old H&M cardi from my scrap box.  The band and skirt side panels from Cakewalk fabric from my stash.  Best of all? The front pockets made from a PIP Studio washcloth that I received as a gift.  Not knowing what to do with one washcloth of such beauty, I thought it was best when showcased on the hoodie instead of being treasured but unused in a closet.  So I cut it up.  PIP have such beautiful colorful fabric designs, I still hope these will become available to the home sewist one day.  I think all I bought for this project is the parting zipper. 

Ah, the zipper.  The pattern calls for a zipper in a size shorter than I would like it to be.  Since I bought the zipper based on the specs I was too scroogy to buy another one.  This let me with a gap to bridge between zippers end and hoods end of, well, roughly 4 cm.  So, if you are planning to make this, I strongly recommend buy a zipper 5cm larger than directed on the pattern, and measure and cut your patterns pieces to match that zipper (you may need to add another cm to your pattern pieces).  That way, the zipper will go all the way up to the top.  I for now solved the situation by adding a loop of velvet ribbon on one side and a pretty flower button on the other.  DD does not seem to mind since she never wears it fully closed anyway. 

As I saw the beautiful creations over at Glitzerblumes (who just happens to be the designer of this pattern too) here, here and here, I knew I wanted my girls name on the front as well. All in all I think this has become a lovely hoodie.  Now let´s hope my dresses-and-skirts girl will wear it! To help with that, I whipped up a matching lazy skirt.